


How to Clean a Golf Bag: A Complete Guide
Posted by Tayte Andruss on Apr 30th 2026
Your golf bag is more than just a storage space for your clubs; it’s an investment that deserves the same level of care and attention you give to your game. Over time, dirt, grass, and even moisture can accumulate, making your bag look worn out and reducing its longevity. But don’t worry, cleaning your golf bag doesn’t have to be a daunting task. With a few simple steps and the right tools, you can restore it to a like-new condition in no time. Whether your bag has been through a muddy season or is just in need of a routine refresh, this guide will show you how to clean a golf bag the right way, no matter the material. Ready to get your bag looking course-ready again? Let’s dive into the process!
Things You’ll Need
Collect these materials before you begin. You most likely have all of them at home already:
|
At a Glance: What You’ll Need |
|
Mild dish soap (or gall soap for heavy-duty nylon cleaning) |
|
Warm water in a bucket |
|
Soft sponge and an old toothbrush (or small soft-bristle brush) |
|
Vacuum with a narrow nozzle attachment |
|
Microfiber towels or dry rags |
|
Stain remover (the same product you use for laundry works fine) |
|
Garden hose (optional, for rinsing nylon bags) |
|
For leather bags: leather cleaner, leather conditioner, and a leather protectant spray |
If you own a leather bag, do not use standard dish soap on the leather surface. Leather requires its own dedicated products. Keep a separate small kit for leather care.
How to Clean a Golf Bag: Step-by-Step
The best way to clean a golf bag is a methodical, top-to-bottom process. Rushing or skipping steps is where most cleaning attempts fall short. Follow these ten steps in order for the best results.
Step 1: Empty and Inspect the Bag
Remove every item from the bag: clubs, balls, tees, gloves, ball markers, rangefinder, extra layers, and anything else in every pocket. Turn the bag upside down and give it a shake to dislodge loose debris. Once empty, inspect the exterior for scuffed seams, fraying stitching, loose zippers, or cracked strap hardware. Catching these issues now means you can address them as part of the cleaning process rather than discovering them mid-round.
Pro Tip: Sort through everything you remove. This is a great opportunity to declutter. Dried-up tees, broken ball markers, and expired scorecards all add unnecessary weight.
Step 2: Vacuum All Pockets and Compartments
Use the vacuum’s narrow nozzle attachment to clean each pocket individually: the ball pocket, the apparel pocket, the valuables pocket, and the areas around the club dividers. Grass clippings, sand, and dirt settle into the bottom corners of pockets and are difficult to remove once wet. Vacuuming first makes the rest of the cleaning process significantly easier.
Pro Tip: An old paintbrush works well for dislodging debris from tight pocket corners before vacuuming.
Step 3: Detach and Clean the Straps
If your bag’s shoulder strap or carry strap is removable, take it off and soak it in a small bucket of warm, soapy water for three to five minutes. Use the toothbrush to scrub along the webbing and any stitched sections. Rinse thoroughly, then lay it flat on a clean surface and press firmly with a dry towel to remove excess water. Set it aside to air dry in the shade. For non-removable straps, clean them in place using a damp, soapy cloth and rinse with a clean, damp cloth.
Pro Tip: Never dry straps in direct sunlight. UV exposure fades color and weakens synthetic webbing over time.
Step 4: Pre-Treat Visible Stains
Apply a small amount of stain remover directly to any grass stains, mud streaks, or scuff marks on the bag’s exterior. Allow the product to sit for three to five minutes so it can begin breaking down the stain. Do not scrub aggressively at this point. If you’re unsure how the stain remover will react with your bag’s material, test a small amount on an inconspicuous area first, such as the underside of a pocket flap.
Pro Tip: Grass stains respond well to a pre-treatment soak. Mud stains are easier to remove once fully dry, so brush off any dried mud before applying stain remover.
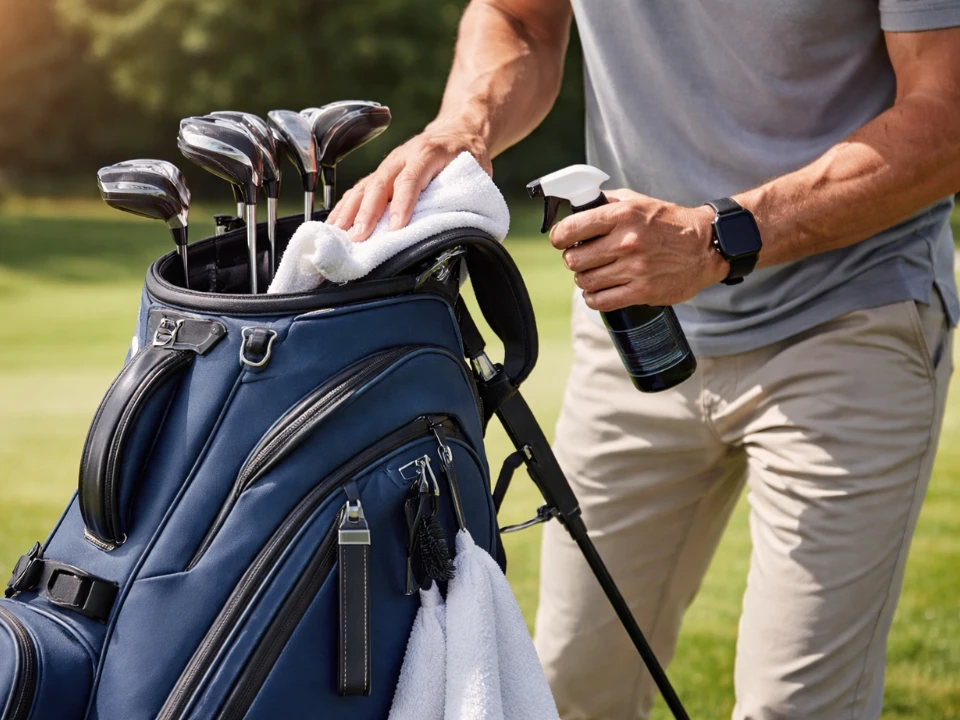
Step 5: Wash with Warm Soapy Water
Add a small squirt of mild dish soap to your bucket of warm water and mix until lightly sudsy. Dip your sponge into the solution and wipe down the entire exterior of the bag, working from the top down. Use the toothbrush on seams, pocket edges, the bag base, and any textured panels where dirt tends to grip. The base of the bag and the bottom inch of each pocket exterior typically require the most attention. For leather bags, use a leather-specific cleaner applied to a soft cloth rather than a bucket solution, and work in small sections.
Pro Tip: Apply moderate, consistent pressure when scrubbing. Scrubbing too hard on nylon can disturb the fabric’s DWR (durable water-repellent) coating.
Step 6: Clean the Zippers and Hardware
This is a step that both beginner and experienced golfers frequently skip, yet it makes a significant difference. Use a damp toothbrush to work along the zipper teeth of every pocket, removing trapped grit and dried mud. Pay attention to the zipper pulls and the metal or plastic hardware at each end of the track. After the bag has fully dried, a small amount of wax-based zipper lubricant applied to the teeth will restore smooth operation and protect the zipper mechanism. Avoid oil-based lubricants, which attract and trap more dirt.
Pro Tip: Stiff or sticking zippers are almost always caused by accumulated grit in the zipper teeth. Cleaning them out properly eliminates this problem in most cases.
Step 7: Rinse Thoroughly
Use a garden hose on a gentle setting to rinse the entire exterior of nylon or synthetic bags, paying close attention to pocket edges, seams, and zipper areas where soap residue collects. If you don’t have access to a hose, use a clean cloth wrung out in fresh water and wipe down the entire bag multiple times until no soap remains. Soap left on the fabric surface will attract more dirt after the bag dries and can lead to discoloration over time. For leather bags, use a barely damp, clean cloth only and avoid any direct water flow.
Pro Tip: Work systematically, section by section, so you don’t miss any soapy areas.
Step 8: Address Any Remaining Stubborn Stains
After rinsing, take a step back and assess the bag. Most stains will have lifted. For anything remaining, reapply stain remover, work it in gently with the toothbrush using circular motions, and rinse again. Nylon bags can handle up to three cleaning passes without material damage. For stubborn turf stains on nylon, a solution of warm water with a small amount of white vinegar can help lift any remaining color. For leather, use only a leather-specific stain product and follow the product’s instructions carefully.
Pro Tip: Patience matters more than pressure here. Let the cleaning product do the work rather than scrubbing harder.
Step 9: Dry the Bag Correctly
Open every pocket and unzip every compartment fully. Turn the bag upside down to allow any water that has collected in the bottom of the main compartment and divider tubes to drain out. Then set the bag right-side up, with all openings facing out, in a shaded, well-ventilated area. Allow a minimum of 24 hours for nylon and synthetic bags, and 48 hours for leather bags. Do not use a hair dryer, place the bag next to a radiator, or set it in direct sunlight to speed up drying. Heat sources can warp the bag frame, crack leather, fade color, and compromise fabric coatings. The bag must be completely dry before you load it back up.
Pro Tip: Hang the bag on a rack or fence if possible, so air can circulate around all sides rather than just the top.
Step 10: Protect, Organize, and Store Properly
Once the bag is fully dry, apply a fabric water-repellent spray to nylon or synthetic bags and a leather protectant to leather bags. Both treatments help repel future staining and extend the life of the material. Then reload your bag thoughtfully: balls and tees in the ball pocket, gloves and accessories in their correct compartments, and clubs organized by type in the dividers. Store the bag upright in a climate-controlled space away from damp basements, hot garages, or attics with extreme temperature swings.
Pro Tip: Apply protectant in a thin, even coat and allow it to cure fully before taking the bag out on the course.
How to Clean a Golf Bag Based on Material
Different bag materials require different approaches. Applying the incorrect cleaning method to the wrong material is the leading cause of bag damage during cleaning. The table below offers a quick reference, complemented by detailed instructions for the two most common materials.
|
Bag Material |
Best Cleaner |
Water Use |
Drying Tips |
Protectant |
|
Nylon |
Mild dish soap or gall soap |
Hose rinse OK |
Air dry, pockets open |
Fabric water-repellent spray |
|
Leather |
Leather-specific cleaner |
Damp cloth only; never soak |
24-48 hrs, shade only |
Leather conditioner + protectant |
|
Synthetic / Polyester |
Mild dish soap |
Gentle sponge rinse |
Air dry 24 hrs |
Fabric protectant spray |
|
Canvas |
Mild soap + soft brush |
Sponge rinse only |
Air dry fully |
Waterproof canvas spray |
How to Clean a Nylon Golf Bag
Nylon is the most forgiving material to clean. The ten steps above apply directly. For cleaning golf bag panels made from nylon, mild dish soap is effective for everyday dirt. For heavier soiling from mud-heavy rounds, gall soap provides a stronger clean without damaging the fabric. Nylon can handle a direct rinse from a garden hose on a gentle setting, which makes the rinsing step fast and thorough. After drying, always reapply a DWR (durable water-repellent) fabric spray, especially if the bag is used frequently in wet or dewy conditions. This restores the water-shedding performance that the bag had when it was new.
How to Clean a Leather Golf Bag
Understanding the proper way to clean a leather golf bag is crucial, as mistakes can have lasting effects. Leather, being a natural material, requires moisture to remain flexible. However, excessive water can lead to it warping, hardening, and potentially damaging the bag’s crack.
Here is the process specific to leather bags:
- First, remove any dust and debris from the surface using a gentle, dry cloth.
- Dampen a separate cloth with lukewarm water and gently clean soiled sections using light circular motions.
- Work through the bag in small sections using a clean cloth and a high-quality leather cleaner. Never apply cleaner directly onto the leather.
- Allow the bag to dry completely in the shade before the next step.
- Apply a leather conditioner with a clean cloth, working it evenly across all leather panels. This step prevents the material from drying out between cleans.
- Apply a leather protectant spray at the end to prevent future stains and water spots.
Never soak a leather bag, use bleach or ammonia-based products, apply alcohol-based cleaners, or dry it with a heat source. If the bag has deep staining or significant cracking, a professional leather care service is the safer option.
Cleaning Tips by Bag Type
The ten-step process applies to all bag types, but each style has one or two areas that need specific attention:
Stand Bags
Stand bags have folding leg mechanisms that collect soil, grass, and grit from constant ground contact. Clean the legs and the rubber foot pads with a toothbrush and soapy water, then rinse and dry them fully before folding. Check the leg-release mechanism while you’re there and make sure it operates smoothly.
Cart Bags
Cart bags have large flat base panels that sit directly on cart frames. These panels accumulate pressed-in grime from cart contact. Spend extra time scrubbing the base and the cart strap pass-through loops with the toothbrush. These loops often trap grit that causes premature wear on the strap.
Sunday and Carry Bags
Smaller carry bags have compact pockets that trap debris tightly. A vacuum is especially useful here. Because these bags are lighter and touch more frequently during a round, their handles and top rims accumulate grip oils and sweat that standard wiping misses. Use the toothbrush on the top rim and handle areas.
How to Get Rid of Golf Bag Odor
A musty smell in a golf bag almost always comes from trapped moisture in the pockets. The most common culprits are damp gloves left inside after a wet round, a wet towel stored in the bag, or moisture from playing in rain or heavy dew that was never allowed to dry.
To eliminate odor:
- Complete the full ten-step cleaning process first. Odor is a symptom of accumulated grime and moisture, so cleaning the source is the priority.
- Dry the bag thoroughly with all pockets and compartments fully open, allowing airflow into every section.
- Place an activated charcoal sachet or a small cedar block inside the main pocket when storing the bag between rounds. Both absorb residual moisture and neutralize odor naturally.
- A light spray of fabric refresher on the interior of pockets once they are fully dry can neutralize any remaining smell.
- Going forward, remove damp gloves, towels, or any wet items from the bag immediately after each round and allow the bag to air out before storing it.
Prevention is the most effective odor strategy. A bag that is aired out and stored dry after every round rarely develops a persistent smell, regardless of how frequently it is used.
Golf Bag Maintenance Schedule
One of the best things you can do for your bag is to build a simple cleaning routine for a golf bag into your regular golf schedule. The table below shows what to do and how often. A consistent routine keeps the full cleaning quick because dirt and grime never get the chance to build up.
|
Frequency |
Action |
Notes |
|
After every round |
Wipe down exterior, remove damp items, leave pockets unzipped to air out |
Prevents moisture buildup and odor |
|
Monthly (active season) |
Full clean using the 10-step guide; inspect zippers and straps |
Reapply protectant spray after drying |
|
End of season |
Deep clean; condition leather bags; lubricate zippers; store upright |
Climate-controlled storage is ideal |
|
Annually |
Inspect seams, divider tubes, leg mechanisms, and cart strap loops for wear |
Replace worn components before next season |
Troubleshooting Common Golf Bag Problems
Mold or Mildew Inside the Bag
If you notice white or grey spotting on the interior pocket fabric, the bag was stored while damp. Take the bag to a well-ventilated outdoor area. Use a dry brush to sweep away surface growth before applying any moisture. Then clean affected areas thoroughly with warm, soapy water and a medium-bristle brush. Rinse and allow the bag to air dry for a minimum of 48 hours with all compartments fully open before using or storing it again. For leather bags with mold growth, consult a professional leather care service rather than attempting to treat it at home.
A Zipper That Won’t Close Smoothly
Stiff or skipping zippers are almost always caused by grit packed into the zipper teeth. After cleaning and fully drying the bag, run the dry teeth of a beeswax block or a wax-based zipper lubricant along both sides of the zipper track. Work the zipper back and forth several times to distribute the wax. Avoid any oil-based products, which attract more dirt and make the problem worse over time.
Stubborn Scuffs on a White Bag
White bags show every mark, which is why they need more frequent attention. For scuff marks on nylon or synthetic white bags, a magic eraser used very gently on the affected area can lift residual discoloration after cleaning. Always use cold water for white bags during rinsing, as warm water can set certain stains into lighter fabrics. Dry white bags in the shade only. Sun exposure causes uneven yellowing on white and light-colored materials.
When to Use a Professional Golf Bag Cleaning Service
If your bag has deep structural soiling, extensive leather damage, or mold growth that covers a significant area, a professional golf bag cleaning service is worth considering. Specialist sporting goods restoration services have the equipment and expertise to handle materials and staining levels that go beyond what is practical at home. It’s a good option for premium leather bags, vintage bags with sentimental value, or any bag where the risk of DIY damage outweighs the cost of professional care.
Keep Your Bag Course-Ready
Knowing how to clean golf bags properly is one of the simplest ways to protect a significant piece of golf equipment at a Golf Store. A clean bag lasts longer, stays organized more easily, and represents the care you put into your game.
Once you’ve followed the ten-step process a couple of times, how to clean a golf bag becomes a quick, familiar routine rather than a chore. Getting started is usually the hardest part.
If your bag is past the point of cleaning and it’s time for a new one, explore our Embers Golf collection. We offer a wide range of high-quality golf bags from trusted brands, designed to withstand countless rounds and stay looking great for the long haul. Browse our trusted brands Golf Bag collection and discover the perfect one for your game.
Frequently Asked Questions
How Often Should I Clean My Golf Bag?
For golfers who play regularly, a full clean once a month during the active season is a good target. After any particularly muddy or wet round, give the exterior a quick wipe-down and leave the bag to air out before storing it.
Can I Put My Golf Bag In The Washing Machine?
No, a washing machine can warp the bag’s frame, break the divider tubes, damage zippers, and strip protective coatings from the fabric. Always hand-clean your golf bag using the method described in this guide.
How Do You Wash A Golf Bag Without Damaging It?
The key to knowing how to wash a golf bag safely is to avoid saturating it with water, use only gentle cleaning products appropriate for the bag’s material, and allow it to air dry completely before storing or using it.
What Is The Best Golf Bag Cleaner To Use?
For nylon and synthetic bags, mild dish soap is the most practical and effective golf bag cleaner for general cleaning. For tougher stains on nylon, gall soap provides stronger cleaning power. For leather bags, always use a dedicated leather cleaner and follow it with a conditioner. Avoid bleach, ammonia-based products, and alcohol-based cleaners on any bag material.
How Do I Clean My Golf Bag If It Smells Musty?
Complete the full cleaning process first, as the smell is a symptom of trapped moisture and grime rather than a surface issue. Dry the bag thoroughly with all pockets open, then place an activated charcoal sachet inside the main compartment. Prevent future odor by removing damp items immediately after every round and storing the bag in a ventilated area.
How Do I Get Mold Out Of A Golf Bag?
Take the bag outside and dry-brush away any visible surface growth. Clean the affected areas thoroughly with warm soapy water and a soft brush, rinse well, and allow the bag to dry for at least 48 hours with all compartments fully open. For leather bags with significant mold growth, a professional cleaning service is required.
How To Clean Your Golf Bag Zippers?
Use a damp toothbrush to scrub along the zipper teeth during the main washing step. Once the bag is fully dry, apply a wax-based zipper lubricant to the teeth and work the zipper back and forth several times. This removes grit and restores smooth operation. Avoid oil-based lubricants.
How To Clean Golf Bags That Are White Or Light-Colored?
White and light-colored bags require more frequent cleaning and a slightly gentler approach. Use cold water to avoid setting stains, dry in the shade only, and use a magic eraser gently on any scuffs after cleaning. A fabric protectant spray applied after every cleaning helps prevent new staining from taking hold.
Have questions? Our team at Embers Golf is here to assist! Reach us at 303-800-5659 or via email at info@embersgolf.com for personalized guidance. Don't forget to check out our blog for expert tips, gear recommendations, and golfing accessories.