


How to Hit Irons: A Beginner’s Step-by-Step Guide
Posted by Tayte Andruss on May 13th 2026
If you’re new to golf or looking to refine your approach, mastering the art of hitting irons is key to improving your game. Golf irons play a crucial role in your toolkit, whether you’re approaching the green or making precise shots from the fairway. However, for beginners, it can feel challenging to make consistent contact. You might struggle with thin shots, fat hits, or slices that stray off course. But don’t worry, this guide will break down each part of the iron swing, from the right grip and stance to common mistakes and practical drills. By following this step-by-step approach, you’ll soon be hitting clean, solid shots with confidence.
What Are Golf Irons?
Before you work on technique, it helps to understand what you are swinging and why the different irons feel so different from each other.
Golf irons are numbered from 1 through 9, with lower numbers producing lower ball flight and longer distances. Most beginner sets skip the 1 and 2-iron entirely and start from the 3 or 4-iron through the pitching wedge (PW). Here is a simple breakdown:
|
Iron Type |
Clubs |
Typical Distance (Men) |
Best Use |
|
Short Irons |
8, 9, PW |
100 to 130 yards |
Approach shots, accuracy |
|
Mid Irons |
5, 6, 7 |
140 to 175 yards |
Mid-range approaches |
|
Long Irons |
3, 4 |
180 to 210 yards |
Long approaches (often replaced by hybrids) |
If you are just starting out, begin every practice session with your 7-iron or 8-iron. These mid-to-short irons are the most forgiving and will teach you every fundamental you need before you move up to the longer clubs.
The 8 Steps of a Solid Iron Swing
Learning how to swing an iron comes down to building a reliable sequence you can repeat every time. These eight steps give you that sequence in plain language.
Step 1: Build the Right Grip
Your grip is the only point of contact between you and the golf club, so it matters more than most beginners realize. The two most common grip mistakes are holding the club in the palm of the hand and using what instructors call the long thumb, where the lead thumb stretches far down the shaft.
Instead, let the club run diagonally across your fingers. When you wrap your trail hand around the grip, your lead thumb should nestle snugly underneath the pad of the trail hand. This creates a unified, one-unit grip that lets your wrists hinge correctly on the backswing and release fully through impact.
Grip pressure should feel firm but relaxed. A useful image: imagine you are holding a tube of toothpaste and you do not want to squeeze any out.
Step 2: Set Up Your Stance and Posture
For mid-irons, place your feet about shoulder-width apart. For short irons, slightly narrow the stance; for long irons, slightly widen it. Allow your knees to slightly soften as you bend forward from your hips rather than your waist.
The balls of your feet, not your toes or heels, should feel where your weight is concentrated. For short irons and wedges, shift about 60 percent of your weight to your lead foot at address. This pre-set promotes the downward strike that produces a clean iron shot. For mid-irons, keep a 50/50 split.
Step 3: Position the Ball Correctly for Each Iron
Ball position is one of the biggest factors in a clean iron golf swing, and it is one of the least discussed. Moving the ball too far forward causes thin shots and hooks. Too far back causes fat contact and low, weak flight.
|
Iron |
Ball Position |
Why It Matters |
|
Short irons (8, 9, PW) |
One ball-width back from center |
Promotes a steeper attack angle and solid contact |
|
Mid-irons (5, 6, 7) |
Center of stance |
Balanced attack angle for consistent flight |
|
Long irons (3, 4) |
One to two balls forward of the center |
Shallower arc to sweep the ball cleanly |
Use alignment sticks at the range to mark your ball position until it becomes automatic. Setup consistency results in impact consistency.
Step 4: Align Your Body to the Target
Stand about five yards behind the ball and pick a spot on the ground two feet in front of your golf ball on the exact line to the target. That small spot becomes your intermediate target.
Set your clubface toward that spot first, then build your stance around it. For right-handed golfers, the target line should be parallel to your feet, knees, hips, and shoulders. This parallel relationship is the most misunderstood alignment concept in golf, and correcting it alone can add yards and accuracy immediately.
Step 5: Make a Controlled Backswing
A clean golf iron swing starts with a patient takeaway. For the first 12 inches of the backswing, keep the club moving low and slow with your wrists staying firm. Let your lead shoulder rotate under your chin as your weight shifts gradually to the trail foot.
Think about a swing plane: imagine a laser pointing out from the grip end of the club. As you swing back, that laser should trace a line toward the ball on the ground. If it points far outside or inside that line, your swing plane is off.
For short irons, your wrists should hinge earlier in the backswing, creating a steeper angle. For long irons, allow a later, slower hinge for a wider, shallower arc. Avoid over-swinging past parallel. A compact three-quarter backswing usually produces more reliable contact than a full swing for beginners.
Step 6: Start the Downswing from the Ground Up
This is the stage that distinguishes novice players from more seasoned ones. The downswing must begin with the lower body, not the arms. As you start down, your lead hip begins rotating toward the target while your hands and the club stay back.
That sequence, lower body first, then torso, then arms, then clubhead, keeps the club on a shallow inside path. When golfers reverse this sequence and throw the club from the top with their arms, the result is an over-the-top move that causes slices and pulls.
One helpful exercise is to stop at the top of your backswing for a full second before beginning to descend. It feels awkward at first, but it trains the correct firing order.
Step 7: Deliver a Descending Blow at Impact
Understanding how to hit your irons correctly means understanding impact. At the moment of contact, your hands should be slightly ahead of the clubhead. This forward shaft lean de-lofts the club slightly and creates the compression that produces a crisp, penetrating ball flight.
Your lead wrist should be slightly bowed rather than cupped. A cupped wrist opens the face and produces high, weak shots with loss of distance. Your hips should be rotating through toward the target, not sliding sideways.
The divot tells the story: a correct iron strike leaves a divot after the ball, not before it. The divot should be shallow, roughly the size of a dollar bill, and pointing toward the target. If your divot is behind the ball, you are scooping instead of compressing.
Step 8: Follow Through to a Balanced Finish
A complete follow-through is not cosmetic. It is direct evidence of what happened before impact. If you decelerate through the ball or stop abruptly, something went wrong earlier in the sequence.
At the finish, your weight should be fully on your lead foot, your chest should face the target, and your trail foot should be up on its toe. Your arms and wrists should have released naturally through the ball, not been held or forced. If you can hold your finish position comfortably for three full seconds, your balance and swing path are on track.
Short Irons vs. Long Irons: Key Differences
Knowing how to hit an iron in golf is not the same as knowing how to hit every iron. The same fundamental swing applies across all irons, but several key variables shift as you move from a short iron to a long iron.
|
Variable |
Short Irons (8, 9, PW) |
Long Irons (3, 4) |
|
Ball Position |
Back of center |
Forward of center |
|
Stance Width |
Narrower |
Wider |
|
Attack Angle |
Steep, descending |
Shallow, sweeping |
|
Wrist Hinge |
Early in the backswing |
Later in the backswing |
|
Divot |
Deeper and sharper |
Shallow or brushing |
|
Typical Beginner Difficulty |
Low |
High (consider hybrid) |
Most beginners struggle with long irons because their lower loft leaves almost no margin for error. If you find your 3 or 4-iron unreliable, replace it with a hybrid club. Hybrids combine iron and wood design, making longer approach shots significantly easier to hit consistently. You will lose nothing in terms of shot shape options and gain a great deal in reliability.
Common Mistakes and How to Fix Them
These tips for hitting irons focus on the most common errors instructors see from beginner golfers, along with clear, actionable fixes for each one.
Hitting Fat (Chunking the Ground Before the Ball)
What is happening: The club strikes the ground before the ball. This usually means the weight stayed on the trailing foot through impact, or the wrists released too early from the top of the backswing.
The fix: At address for short irons, pre-set 60 percent of your weight on the lead foot and keep it there through impact. Practice with a folded towel placed four inches behind the ball. If the towel moves, your club bottoms out too early.
Hitting Thin (Catching the Ball at the Equator)
What is happening: The leading edge catches the middle of the ball, producing a low screamer that flies without much height or control. The most common cause is trying to help the ball into the air by scooping upward.
The fix: Trust the loft of the club. Keep your head steady and let your eyes stay on the back of the ball through impact. Focus on making a divot after the ball, not before it.
Slicing (Left-to-Right Ball Flight for Right-Handed Golfers)
What is happening: The clubface is open relative to the swing path at impact, and the swing path is traveling left across the ball. This combination imparts sidespin that curves the ball hard to the right.
The fix: First, slightly strengthen your grip by rotating both hands a touch to the right on the club. Second, feel like you are swinging toward right field instead of straight at the target. This promotes an inside-out path that reduces or eliminates the slice.
Casting (Losing Lag from the Top)
What is happening: The wrists release, and the club straightens out at the very beginning of the downswing instead of staying hinged deep into the downswing. The result is weak, scooping contact with almost no compression.
The fix: Practice the pause drill from Step 6. When you pause at the top, it forces a proper sequence where the lower body leads first. You can also practice impact bag work, hitting a padded bag or a rolled-up towel to feel the sensation of a firm, forward-leaning shaft at impact.
Three Range Drills to Build Consistency
The best iron swing tips are not just pointers; they are things you can practice with repetition. These three drills address the most common beginner problems and can be done in a 30-minute session.
Drill 1: The Towel Drill (Trains Ball-First Contact)
- Fold a small towel and place it four inches directly behind the ball on the mat or turf.
- Take your normal swing without touching the towel.
- If the towel moves, your club is bottoming out before the ball. If it stays, you are making clean contact.
- Start with half-swings, then progress to full swings once you can consistently avoid the towel.
Drill 2: The Alignment Stick Gate (Trains Inside-Out Path)
- Push two alignment sticks into the ground on either side of the ball, forming a narrow gate just wider than the clubhead.
- Swing through the gate without knocking either stick.
- The gate forces you to approach from inside the target line and exit to the right, eliminating the over-the-top move that causes slices.
Drill 3: Lead Arm Connection (Trains a Wide, Consistent Arc)
- Tuck a glove or small headcover under your lead armpit before you swing.
- Make full swings without dropping the glove.
- This forces your lead arm to stay connected to your body through the swing, preventing the chicken-wing (bent arm through impact) that kills compression and accuracy.
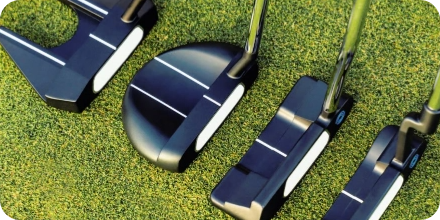
Choosing the Right Irons as a Beginner
Knowing how to hit golf irons is easier when you are playing clubs designed to help beginners. Here is what to look for:
Cavity-back design: The back of the clubhead is hollowed out, moving weight to the perimeter. This makes off-center strikes far more forgiving and keeps the ball flying straighter, even on mishits.
Wide sole: A wider bottom edge glides through the turf more smoothly, reducing the severity of fat shots. This is especially helpful for beginners who have not yet mastered the descending blow.
Regular or senior shaft flex: Beginners with moderate swing speeds generally generate more consistent results with a regular-flex graphite or steel shaft. A shaft that is too stiff for your swing speed makes timing much harder.
A set that runs from 5-iron through pitching wedges, with a separate sand wedge, gives you everything you need as a beginner. Consider replacing the 3 and 4-iron with a hybrid right from the start.
Pre-owned iron sets are worth exploring. A high-quality set from two or three years ago, in excellent condition, can perform just as well as a brand-new Complete Golf Set and costs significantly less. At Embers Golf, we carry a curated selection of game-improvement iron sets perfect for players learning the game.
Frequently Asked Questions
How Do Beginners Hit Irons?
Beginners should start by learning how to swing a golf iron using a 7-iron or 8-iron. Focus first on a finger-based grip, a shoulder-width stance, and a center ball position. Practice making a smooth, even-tempo swing with the goal of brushing the turf after the ball, not before it. Accuracy and contact quality matter far more than distance at this stage.
Should You Hit Down On An Iron?
Yes, absolutely. Hitting down on the ball with a slightly forward-leaning shaft is what creates solid contact and proper ball flight. The club’s built-in loft launches the ball. Trying to scoop or lift the ball causes thin, weak shots. The descending blow is the single most important concept for beginners to internalize.
What Is The Correct Ball Position For Irons?
Ball position changes based on the iron you are hitting. Short irons (8, 9, PW) sit one ball-width back from the center of your stance. Mid-irons (5, 6, 7) sit at the center. Long irons (3, 4) move one to two ball-widths forward of center, toward the inside of the lead heel. Refer to the table in Step 3 for a quick visual reference.
Why Do I Keep Hitting My Iron Fat?
Fat shots happen when the club strikes the ground before the ball. The most common causes are weight staying on the trail foot through impact, or casting the wrists too early at the top of the downswing. Use the towel drill and pre-set your weight forward at the address to correct this pattern.
How Far Should I Hit A 7-Iron?
The average male recreational golfer hits a 7-iron approximately 130 to 155 yards. The average female recreational golfer hits it approximately 100 to 120 yards. Distance varies based on swing speed, attack angle, and the specific club.
What Iron Should A Beginner Start With?
Start with a 7-iron or 8-iron. They offer enough loft to get the ball in the air relatively easily, and they are forgiving enough to reward decent swings without demanding perfection. Once you can make consistent contact with these clubs, gradually work your way up to the longer irons.
How Do I Stop Slicing My Irons?
Two adjustments fix most slices: strengthen your grip slightly by rotating both hands a bit to the right on the club, and swing on a more inside-out path by feeling like you are swinging toward right field. Practicing the alignment stick gate drill from Section 5 will help you feel the correct path in real time.
How Do I Use Irons In Golf For Different Shot Types?
Knowing how to use irons in golf goes beyond just swing mechanics. Short irons are best for precision approach shots where you need to land the ball on a specific target and stop it quickly. Mid-irons cover the majority of your approach shot yardages. Long irons work well off the tee on shorter par 4s where control matters more than distance. As you become more confident, you can start shaping shots by adjusting your grip and swing path slightly.
New To Golf Irons? Start Here
If you are searching for how to hit a golf iron, you are likely in the early stages of learning the game. The answer is straightforward: master your grip and stance first, understand ball position, and focus on making a descending strike. Everything else builds from that foundation. Work through this guide from the top and practice each step before moving to the next.
Final Thoughts
Learning how to hit irons consistently is one of the most rewarding progressions in golf. Every time you compress an iron cleanly and watch the ball fly straight and true toward your target, you will understand why so many golfers dedicate years to perfecting this skill.
The three takeaways to hold onto: grip the club in your fingers, position the ball correctly for each iron, and hit down through the ball to let the loft do the work. Bring those three things to every range session, and you will make progress faster than you expect.
At Embers Golf, we stock a wide range of game-improvement iron sets for players at every stage. Browse our selection to find the right Golf Iron set for your game, and feel free to reach out to our team if you have questions about what to look for. Our expert is available to help! Call 303-800-5659 or email info@embersgolf.com for personalized suggestions. Visit our blog for tips, gear picks, and expert insights into golf accessories.